Because we hadn't seen all the park had to offer, we wanted to revisit it. As we had recently sold our forward-fold camper we would be restricted to tent camping Chris was only interested if it was more convenient and quicker to set up camp. Initially, I was concerned by this request as I was unsure what level of comfort would be required. After some discussion it was agreed that as I wanted a trailer, I would use the aluminium lid and bed from the back of the Hilux, (previously used for a camper), provided the lid could be put up and down by one person, (in the event that one of us was not able to assist in the task).
We thought the best option was using gas struts to decrease the weight of the lid during raising and lowering, but having already worked out the wheels had to protrude inside the tray, I was unsure how useful they would be considering the angle they had to be at during the start of the lift. Another issue was the length of struts available meant joining two struts end to end.
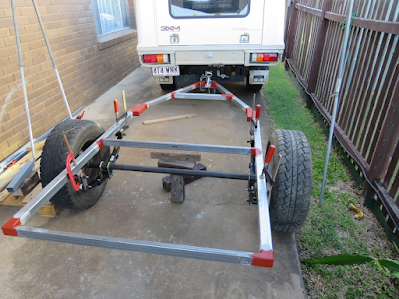
Anyway it was decided, as the Isuzu could not be used to carry the cement mixer, sand, gravel etc like the Hilux could, I needed a trailer to replace it. The design had to be free-standing, use the same size tyres and wheels as the Isuzu, and track it to make it better for towing over sand. We also wanted it to carry the bikes, and the lid be high enough inside for Chris to stand up.
After being reassured a couple of times by Chris that she was prepared to try a home-made camper I was prepared to make it, even if it was only used for one trip. I worked out sizes for axle, and drew up a few drawings to work out sizes and tried to source them locally after pricing them online. As I expected, it was considerably cheaper to buy most parts online and I placed an order. Unfortunately, they came with cheap Chinese bearings, (with the outer race already pressed in), which did not have a good reputation.
Mid-January the parts arrived so I could start. After assembling, to my annoyance, I realised it was impossible to fit the washer and split pin on one side so substituted a nail to stop the castle nut from turning. I initially thought the machinist had stuffed up, but I found out after our 4k trip, (as I was replacing the cheap Chinese bearings), that whoever installed the outer races/cups, used an incorrect size cup and as a result, the outer parts of the rollers did not contact the cup, making it impossible to fit the washer and split pin. (During the trip I carried spare bearings and seals and I was checking it every few hundred kilometres, but we were lucky the bearing did not fail while driving over a few hundred kilometres of corrugations).
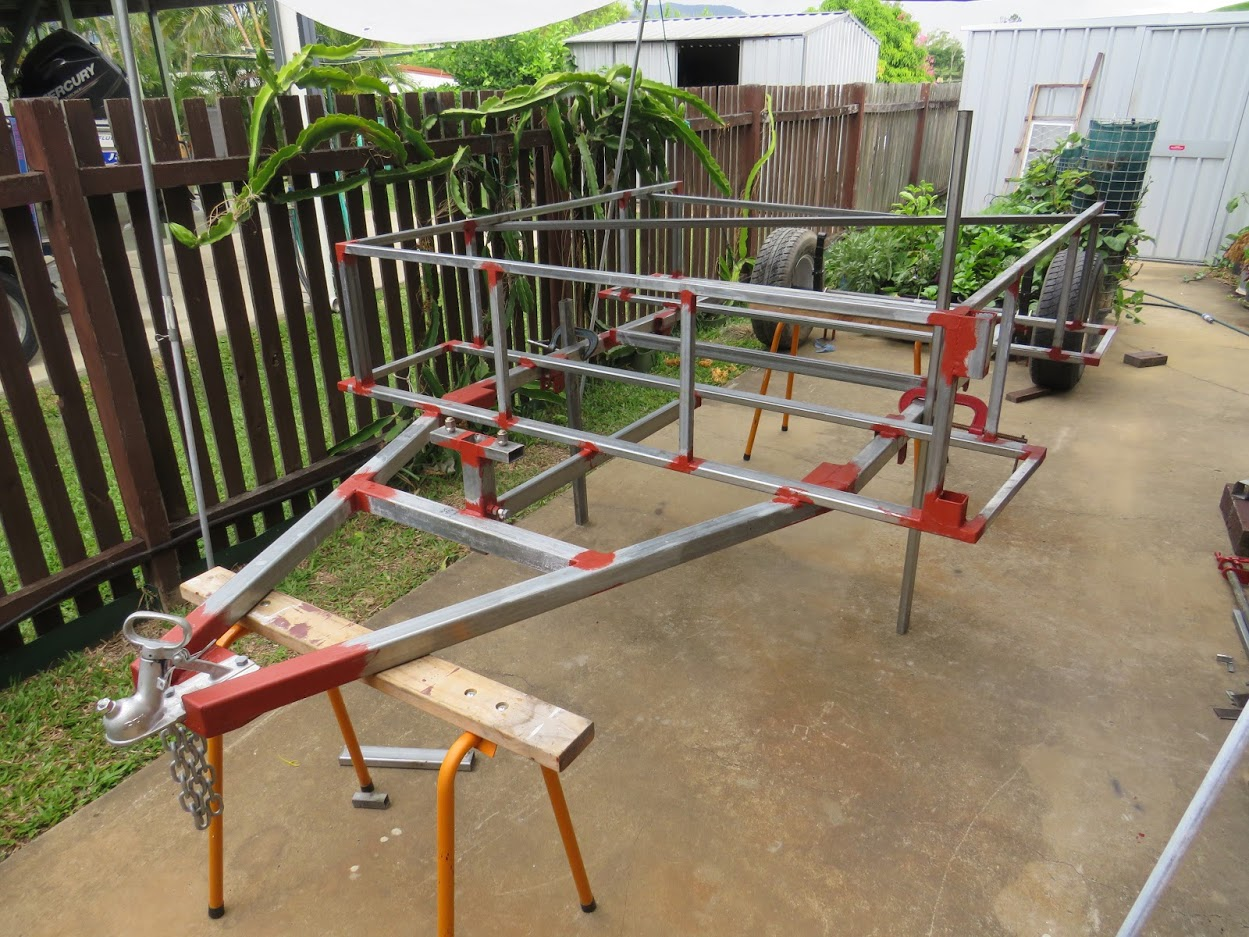
It is much more difficult to weld, but I chose to use galvanised steel, for its corrosion resistance, and after inspecting other trailers to determine what size materials they used, I purchased enough box section steel to make the frame.
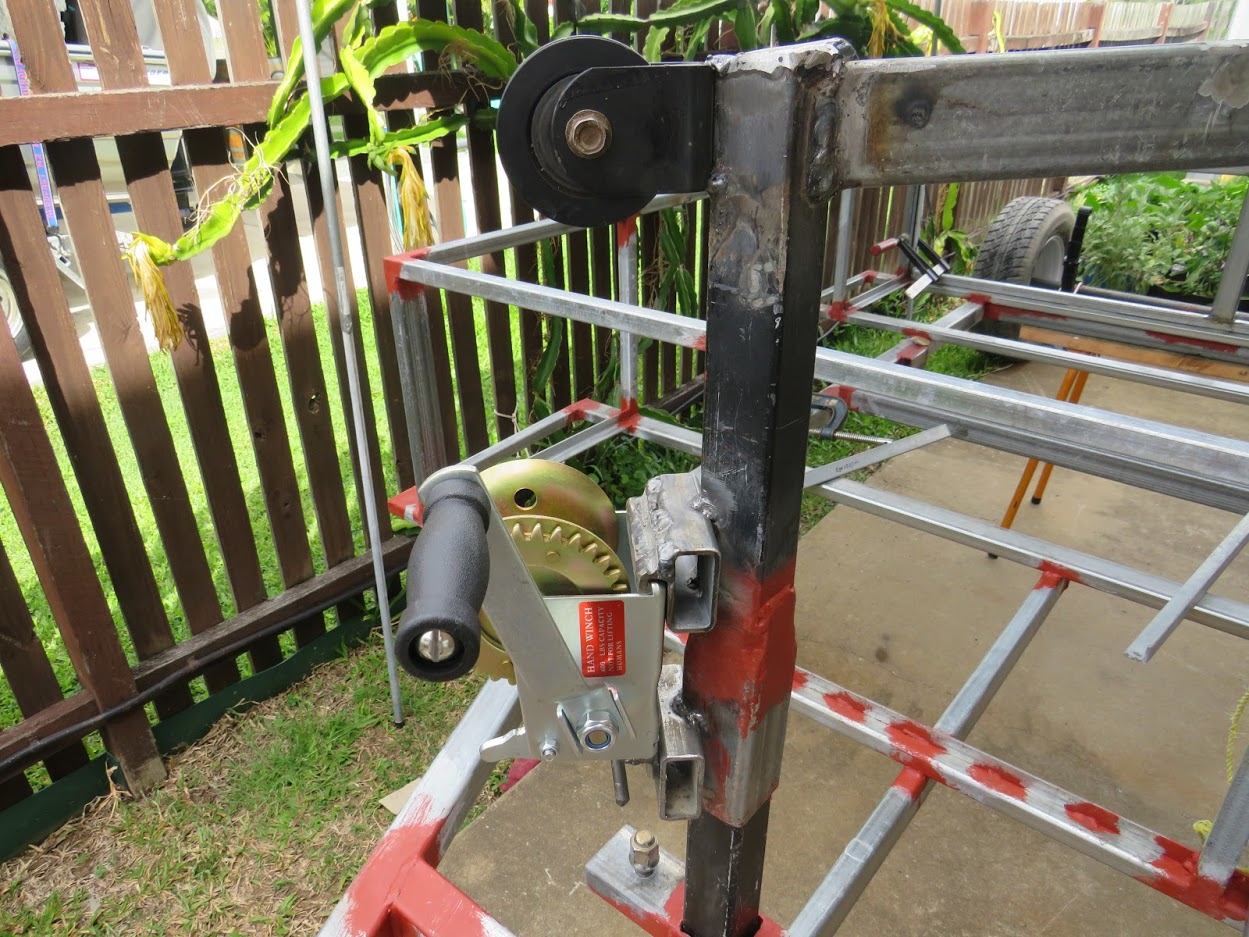
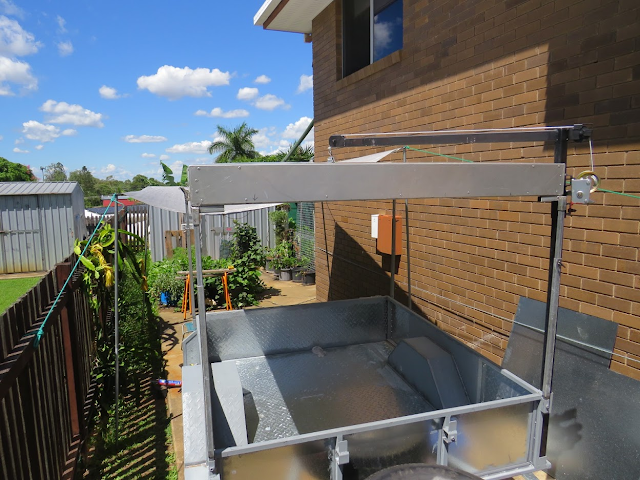
It was while I made the frame that I decided to use a winch to lift the lid, rather than rely on struts, which I doubted would work.

I load-tested the frame to determine how the wheels moved, relative to it, to help work out the clearance for the mudguards, and where the cross-members, in front of and behind the wheel, had to be positioned before tack welding them in place.
Next in the process was the tack welding of the uprights for the box, followed by the top of the box.
After I was happy with the accuracy of the frame, I completed the welding of the frame making sure to minimise heat distortion.

I then welded on the spare tyre holder, that doubled as the upright support for the bikes, and the winch support (right front). I had already worked out both bikes could be carried on an upright through the centre of the spare tyre. The rest of the side steps were welded before making the universal attachment for the bikes. All welds were cleaned and primed at the end of most days, to protect from corrosion.

Secondhand Isuzu/Colorado wheels are very difficult to buy, and on one of my frequent trips to the recycle section at the dump, I was fortunate to buy three, (almost new), 6-stud wheels that fitted the trailer, but not the Isuzu, for $10.00 each. To this point I had been using a couple of smaller Rodeo wheels that I bought secondhand, but adjusted my calculations to allow for the larger Isuzu tyres and wheels with the intention of buying new ones in the future.
The winch was bought online and I made the small crane, using recycled steel, to lift the lid. I also modified the crane to help lift loads into the trailer. The photo shows it attached to the bike support, which is an option.
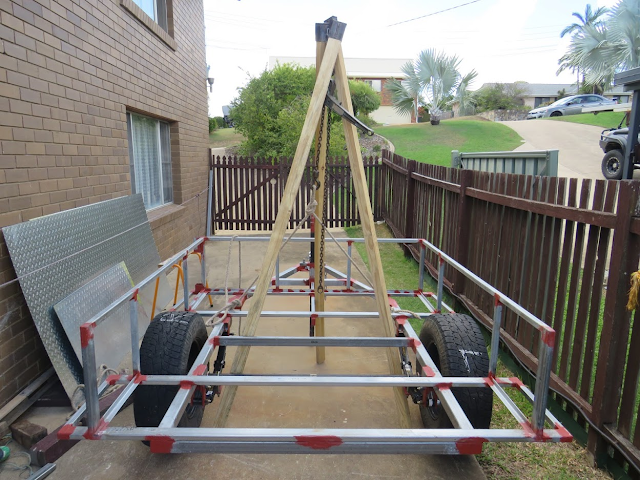
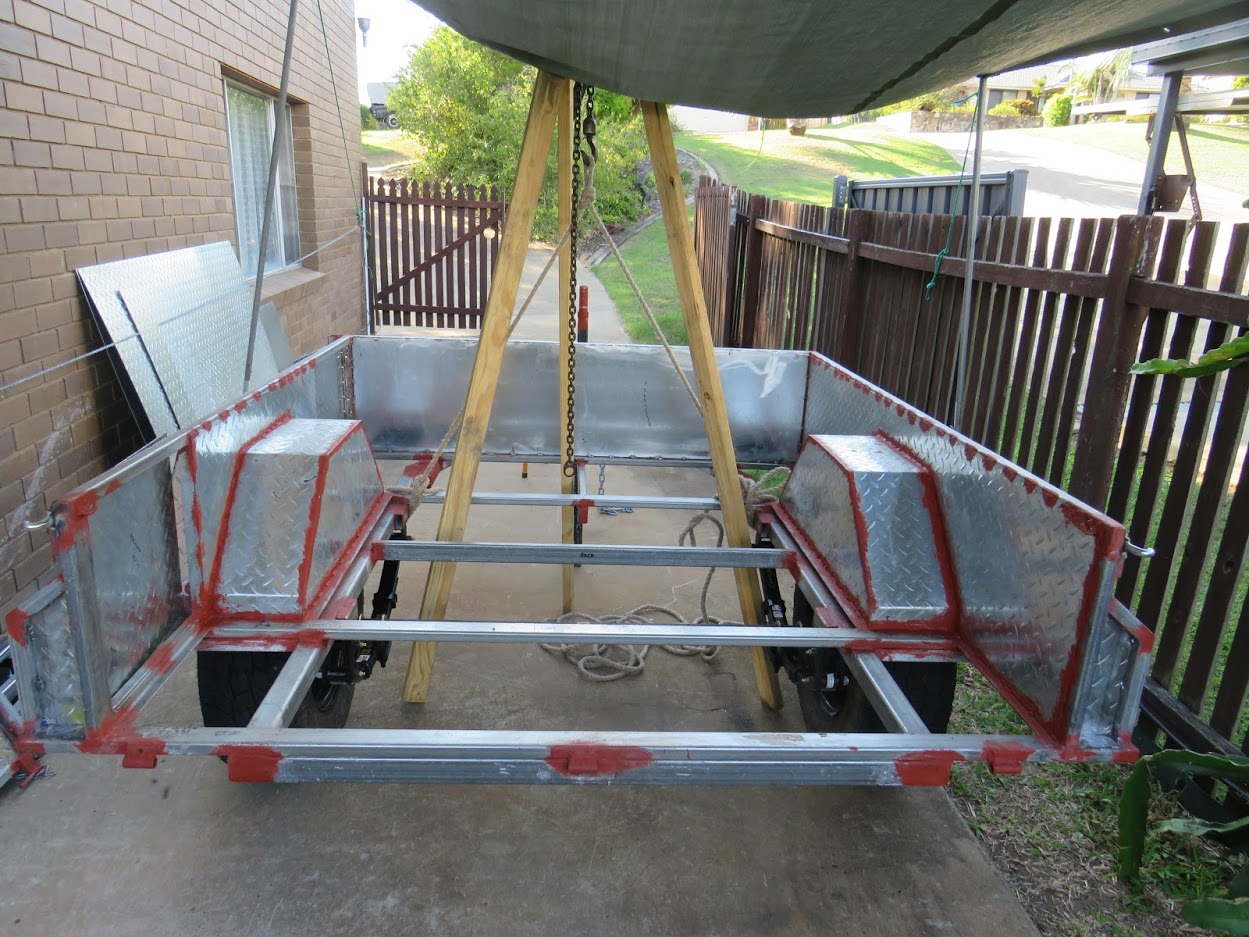
I made the frame for the tailgate, but as I could not source suitable hinges I fabricated three out of scrap from the dump. We intended to enter and exit over the tailgate so it had to support our combined weights, if necessary. This also meant an adjustable leg was needed at the back to stop it tipping. The frame with the tailgate was now too heavy for me to lift alone, and as I had to lift it onto the springs etc, I built a tripod.
After tacking the spring hangers, I removed the suspension, flipped the frame over and welded them and other parts of the frame underneath. I dislike overhead welding.

I spent a day trying to use a 10-ton hydraulic jack to make a pan brake to bend the mudguards, but while it worked, (while the sheet metal was full supported by the frame), the 100x100x5mm box steel failed when I offset the practice piece for the 90 degrees bends. I modified the design and took it to a metal fabricator.
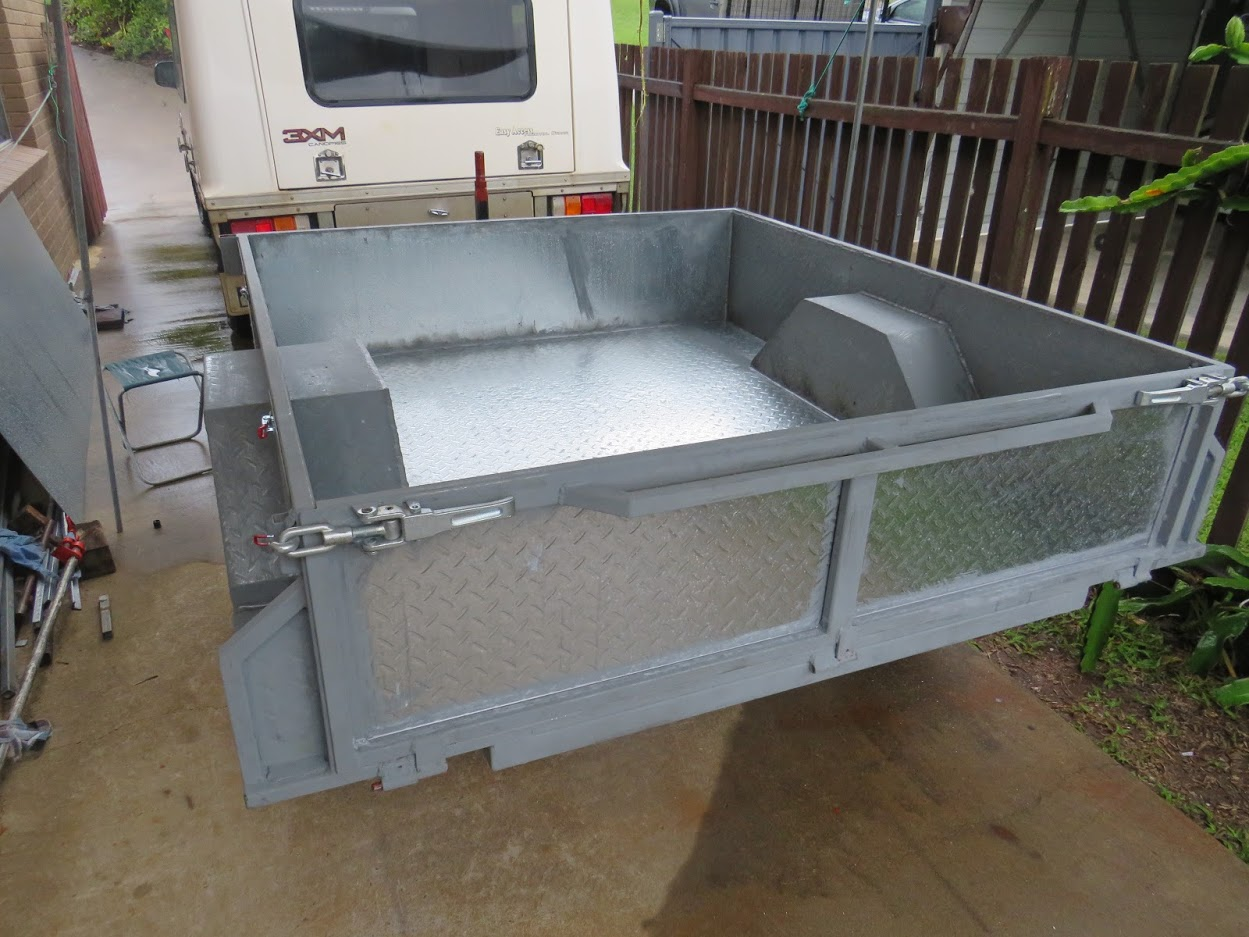
Now came the part I dreaded. Tack welding the sheet metal with an arc welder was always going to be difficult, (as it was only 2 mm thick and some of the uprights were thinner). It also worried me that I would not be able to accurately cut out the sides for the mudguards to fit, through and it would retain the correct shape to weld on the inside. Fortunately it worked as I had hoped, and I think the pressed in galvanised plate looks pretty good.

The hinged access doors on the side can be seen in the photo above and below.
The height of the mudguards was determined by the height of the table that is used for food preparation, cooking, washing up etc, and is connected to one mudguard while camping.
 |
| Using the winch to help lift the floor plate in place |
I was sick of fabricating parts, and when we could not buy a suitable trailer latch locally we bought two online, (without realising how big they were), and modified them to suit. A bit over-kill for the purpose but they look sturdy.
I used neutral cure silicone sealant to fill in the gaps between the tack welded sheet metal, to keep out moisture and improve the appearance.
It was a joint effort to build the folding stone deflector for the bikes. I built the frame and attached the shade-cloth, (that Chris hemmed), to the frame.
The original aluminium lid had one short side, (when it was made for the Hilux), so I had to shorten the height of the other three sides and strengthen it to lift with the winch.
 |
 |
| All registered and ready to roll with aluminium lid during the last week of March. |
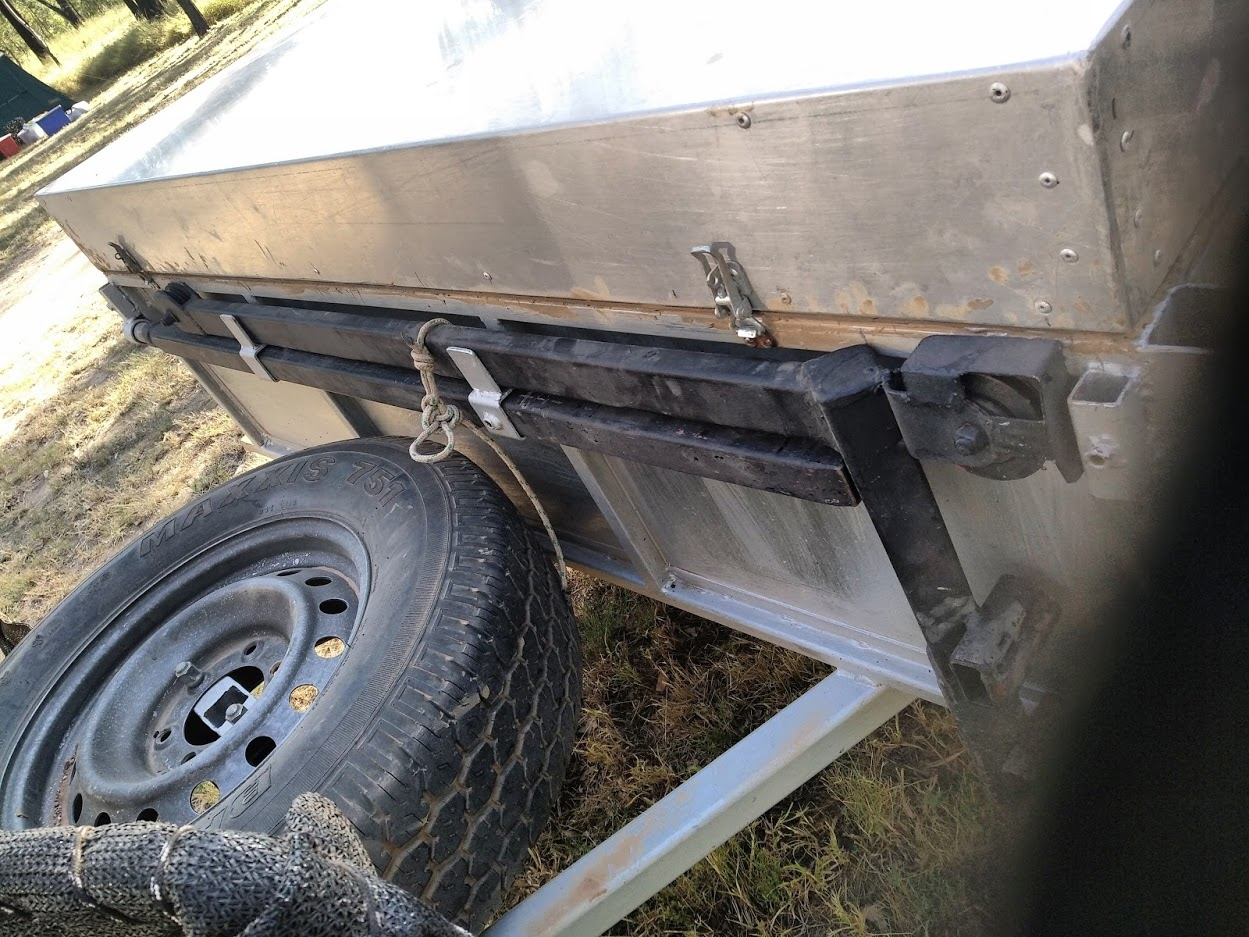 |
| The winch frame stored on the front of the trailer. |
I must admit that I really enjoyed designing, problem solving and making this trailer and I am pleased with how it has performed for the function it was designed. The only part I did not like was being burnt multiple times most days, by molten metal and slag during welding and grinding.
What we have ended up with has made good use of the components we had previously built for camping on the back of the Hilux; the metal lid (turned 90o and height shortened), the bed (with a slight alteration to the middle leg), the blue cover (made from rip-stop nylon clipped onto a small tarp).
 |
| Trailer being used for what it was designed. |
Daryl, great job, nothing like a home design for everything to work as it should. Experience on the road makes it a well thought out construction. We are sure that you and Chris will have a great time.
ReplyDeleteAnnette and Neil